Image Soup
I know it doesn’t sound very yummy, but it does involve some code.
Let’s take some photos
I’ve been getting into film photography lately. It’s a blast, but it’s also hard, and expensive, and frustrating. Most of my photos are terrible, but I don’t mind. The hobby has an addicting gameplay loop that keeps me coming back.
- I buy film
- I take photos
- I get the film developed
- I get cool digital scans a couple days later
Pretty neat, right?
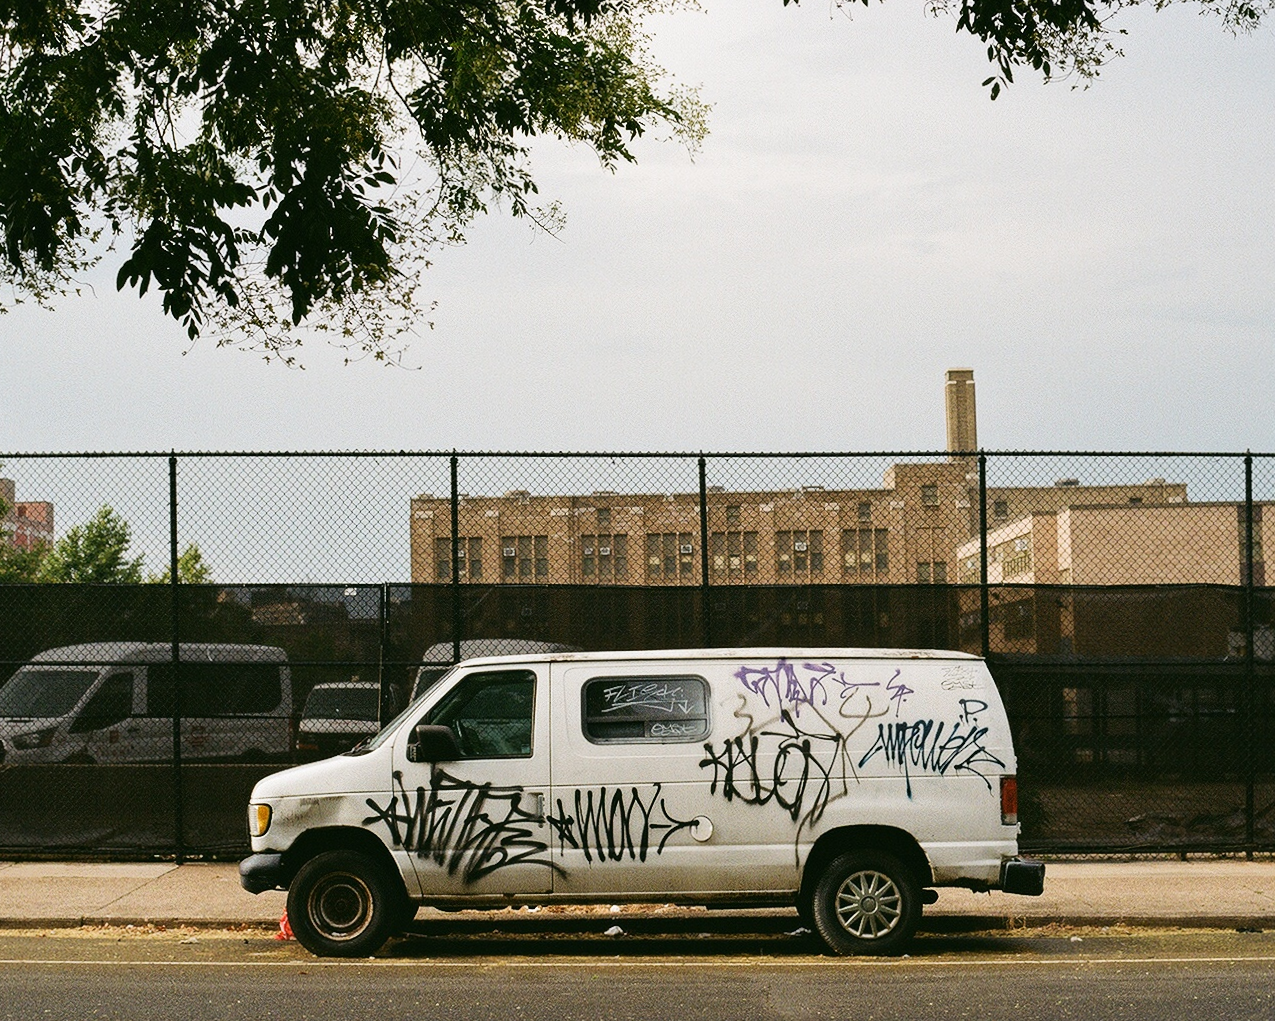
One day I was thinking about my scans and what it would be like to melt them into soup.
I thought about this pixel soup, and imagined pouring it into a mold and popping out a new image made from all the pieces of the old one.
Then I ate something and stopped thinking about soup.
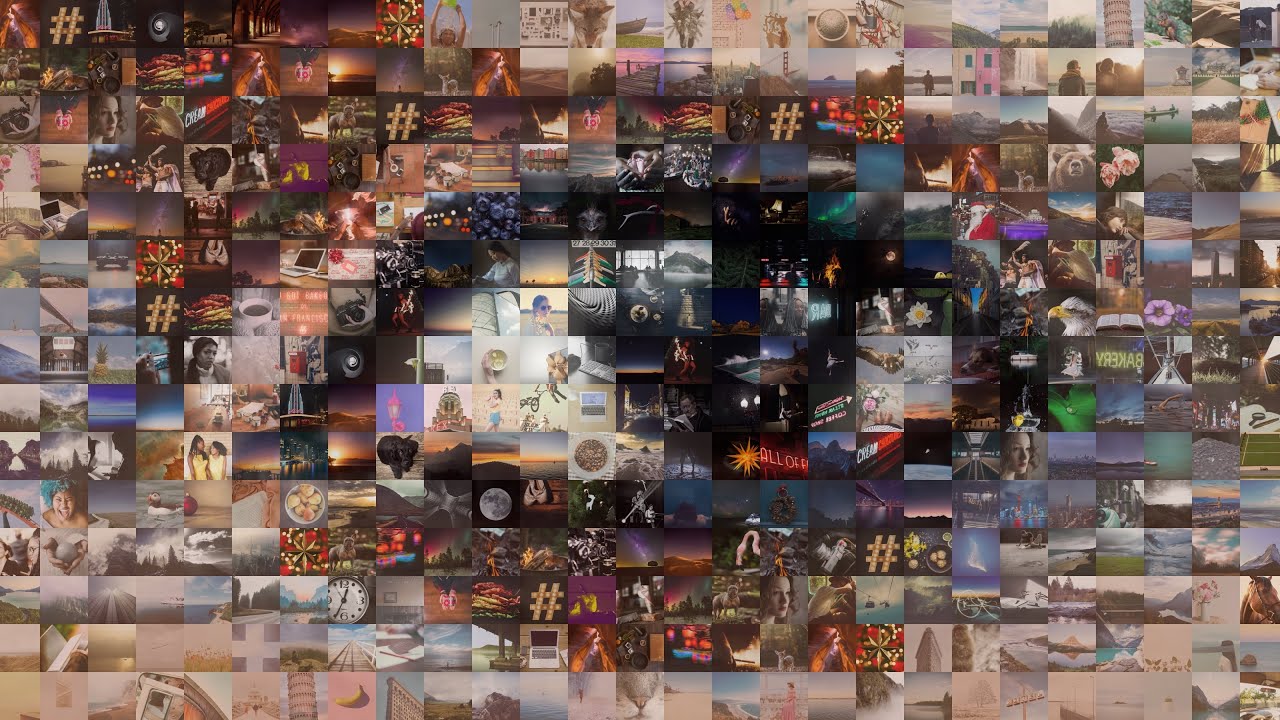
The whole idea seemed really similar to those posters I used to see in office buildings all the time. Generic art of some kind, made up of a mosaic of lots of smaller images.
The point
I wrote a program that makes these sort of pixel soup photos out of my scans. It takes in two images, a donor and a reference, and spits out their baby. The pixels of the donor are melted into soup and used to reconstruct the reference image.
Each pixel in the baby comes directly from the donor, and is used only once.
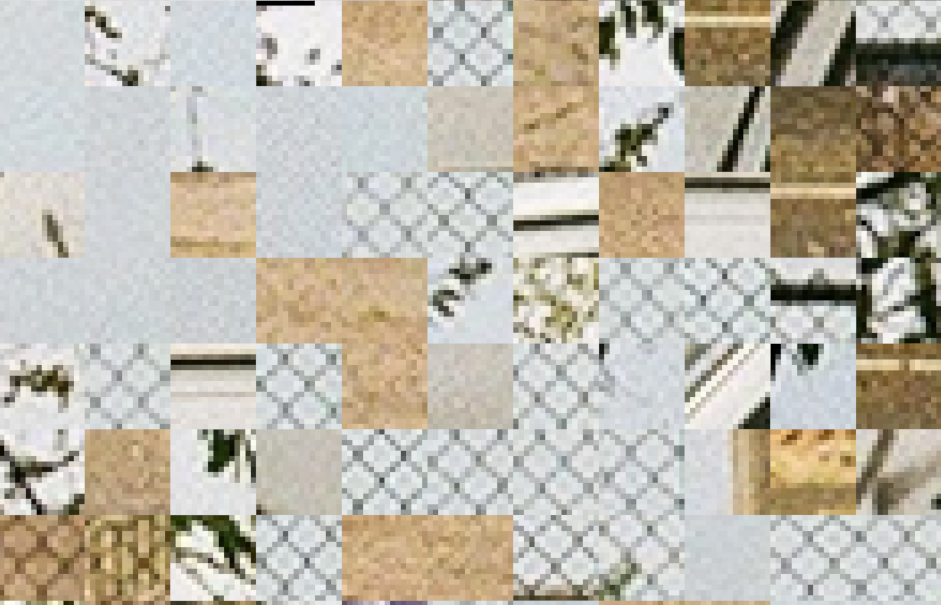
It can also work on chunks of pixels to make pseudo office wall art. Instead of rearranging individual pixels, it splits the donor into a grid and rearranges the blocks of that grid.

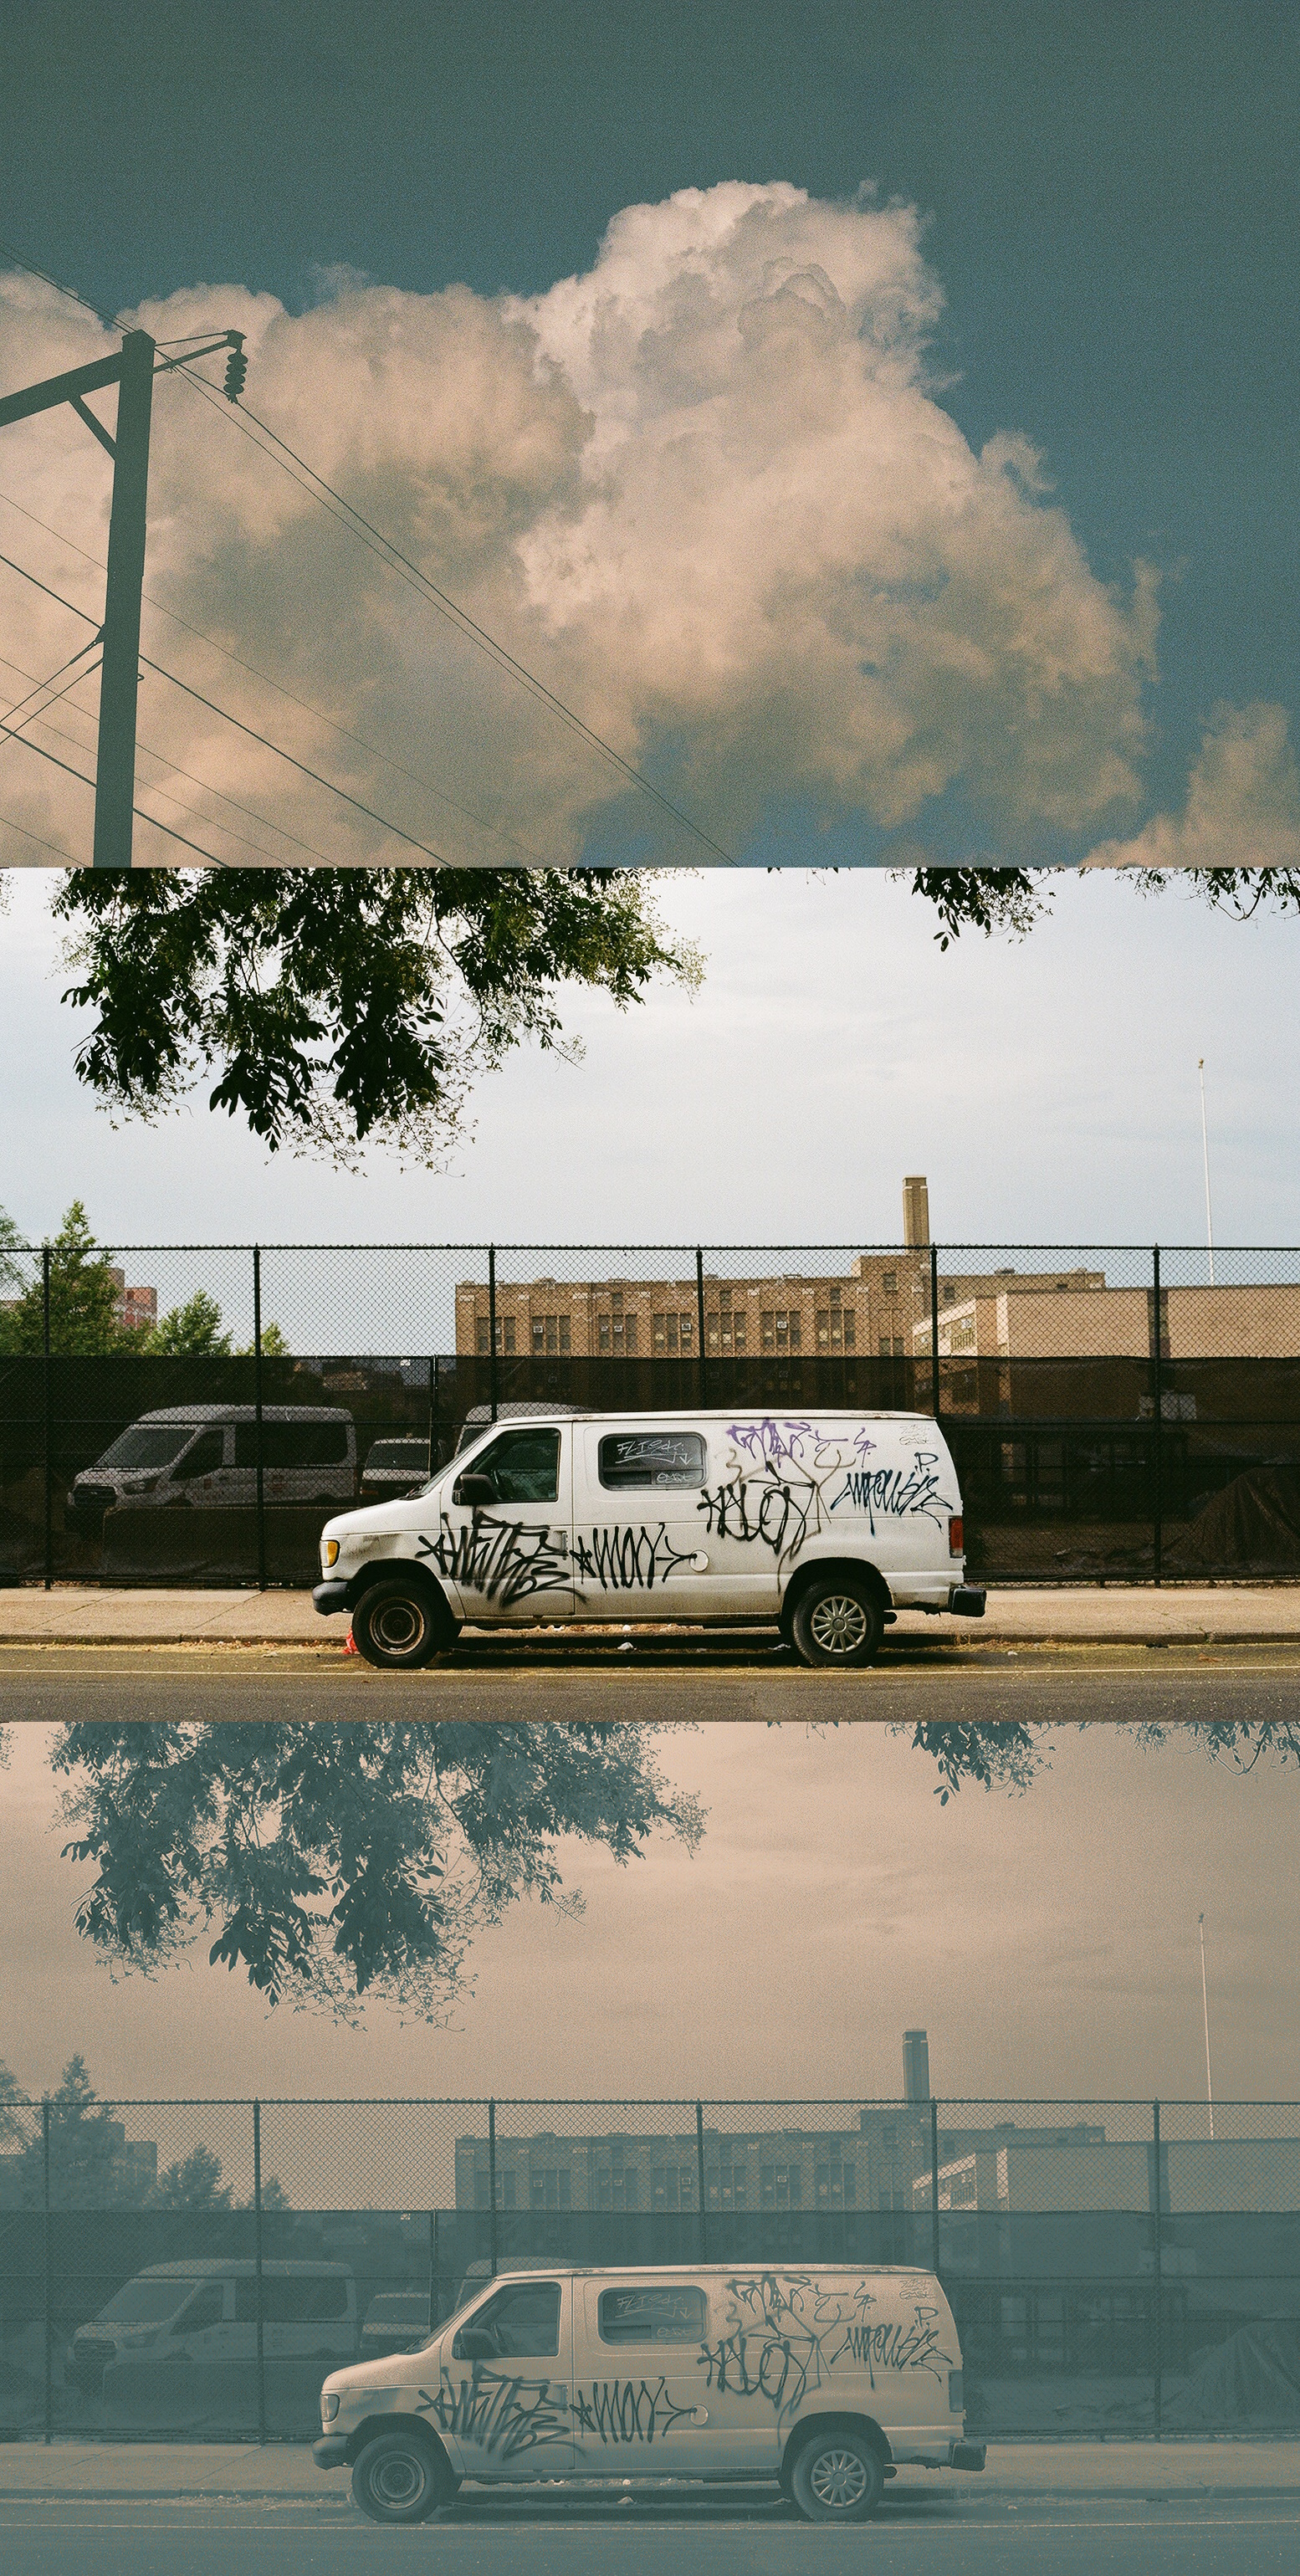
I really like how the clouds come through at the larger block sizes.
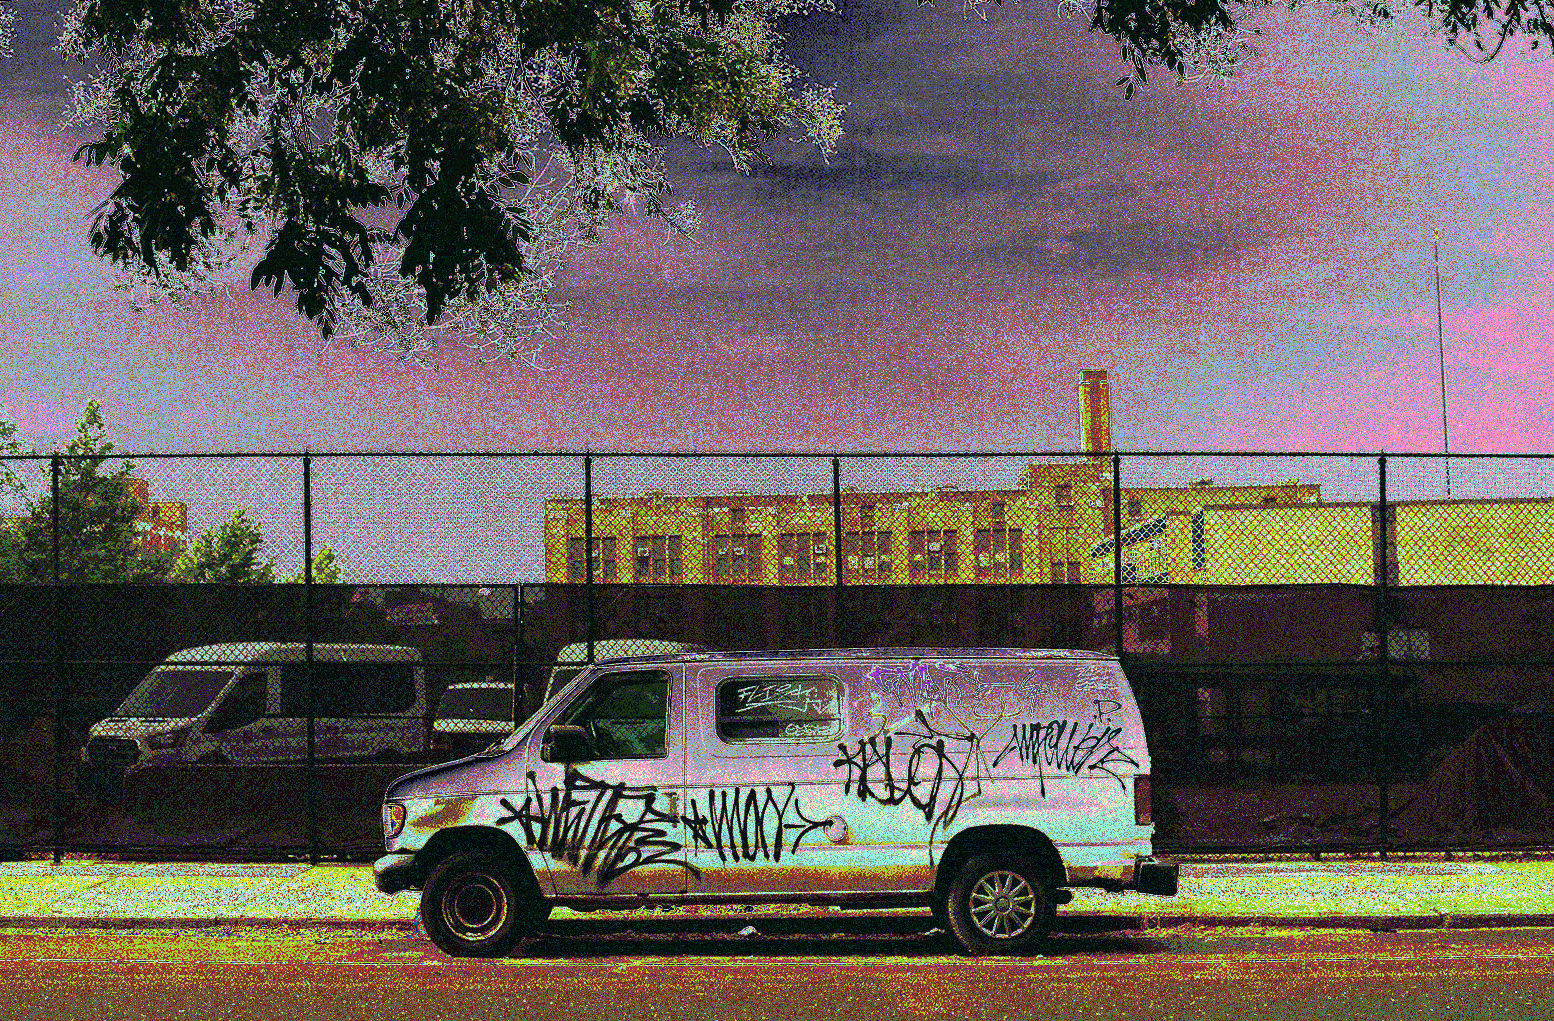
And here’s the same process, but with the roles flipped: the van as the donor and the clouds as the reference, using 16×16 blocks.
Wowza. Look at the fence.
How it works
The algorithm starts off by melting the images into soup. We split each image into a grid of blocks with size smaller than the image width/height.
(We assume both images are the same size, and that block size evenly divides the width and height. If not, we crop or pad, but I skip that here for simplicity.)
Then we go through each block in both grids and record the important information in two lists.
// it doesn't look like it
// but these are bowls of soup
std::vector<BlockRecord> donorBlocks;
std::vector<BlockRecord> referenceBlocks;
Starting from the top left and ending at the bottom right we save a simple struct containing the position and average color for each block.
struct BlockRecord
{
    int blockX;
    int blockY;
    uint32_t averageColorSRGB;
};
The average color is stored as a 32 bit integer, but we really only need the lower 24 bits, so from now on I’m going to pretend it’s only 24 bits.
The first byte stores the red channel, the second stores the green channel, and the last stores the blue channel. Standard stuff. If you’ve ever used a digital art program this should look familiar. Colors are usually represented by an easily copy-pasteable hex number.
FF0000 - red
00FF00 - green
0000FF - blue
So now we have two lists of all the blocks in each image, along with their average color and their position. How do we map blocks from the donor image to their baby?
- For every donor block and reference block, compute its average color
0xRRGGBB(we’ve done this). - Sort
donorBlocksandreferenceBlocksnumerically by their average color. - Pair each record by index:
donorBlocks[i]<->referenceBlocks[i]. - For each pair, copy the pixels from the donor block’s coordinates into the reference block’s coordinates in the output image.
Why does this work?
If we sort both lists, donorBlocks, and referenceBlocks, by their averageColorSRGB value, we get a gradient for each image from hex value 0x000000 to hex value 0xFFFFFF. Records at the same index in each list correspond to the blocks of pixels that most closely match in color.
// both map to the block closest to 0x000000 (black)
donorBlocks[0];
referenceBlocks[0];
After that’s done, we loop through each index of both lists and grab the desired color for the new block from the corresponding donorBlocks record, and the desired position for the new block from the corresponding referenceBlocks record, and copy it out to the new baby image.
for (int i = 0; i < numberOfBlocks; i++)
{
    BlockRecord& donorBlock = donorBlocks[i];
    BlockRecord& referenceBlock = referenceBlocks[i];

    // grab coordinates for pixels from donor
    int sourceStartPixelX = donorBlock.blockX * blockSize;
    int sourceStartPixelY = donorBlock.blockY * blockSize;

    // map to position based on reference
    int destinationStartPixelX = referenceBlock.blockX * blockSize;
    int destinationStartPixelY = referenceBlock.blockY * blockSize;

    // copy it all out
    copyBlock(donorImage, mosaicImage, sourceStartPixelX, sourceStartPixelY, destinationStartPixelX, destinationStartPixelY, blockSize);
}
And that’s basically it. Easy peasy with no issues whatsoever.
The issues
Sorting by averageColorSRGB is imperfect. Even ignoring weird color space stuff, sorting by the sRGB value doesn’t produce a perfect gradient between the image’s most extreme colors.
When we interpret 0xRRGGBB as a single integer and sort, we’re sorting by R first, then G, then B. The result is a gradient primarily dictated by the red color channel, and then the green channel, and then the blue channel.
Here’s an example.
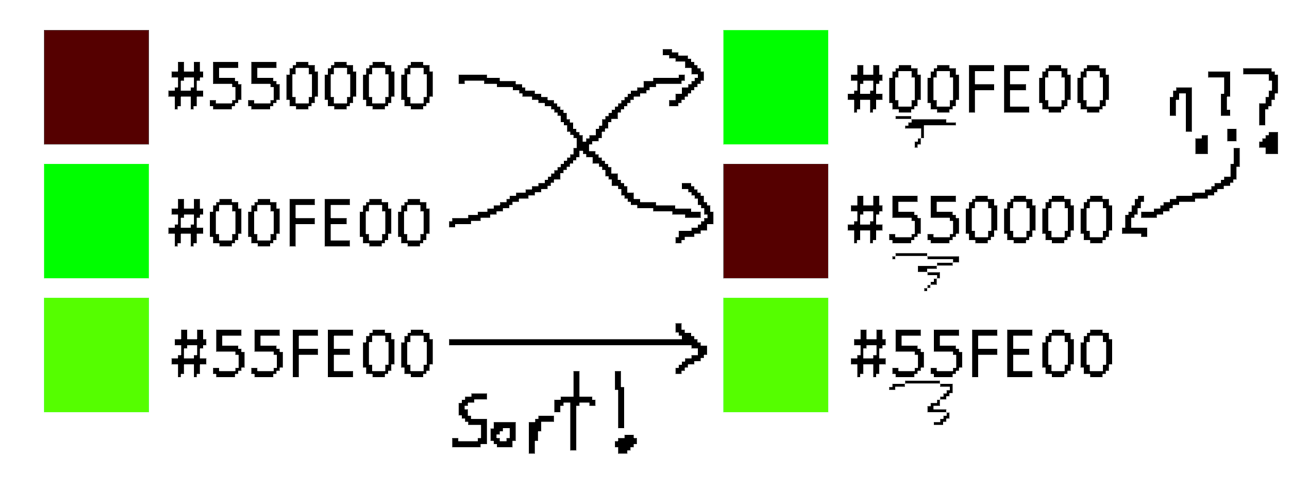
Clearly, the two green colors should end up next to each other. But because of that pesky red channel, they end up separated, like some sort of tragic number based love story.
There are some ways around this. We could sort by luminance, or convert to a perceptually uniform color space like Oklab and do some funky 3D math there.
But really, I don’t think it’s much of an issue. From the results, this approach is good enough. And when the artifacting becomes noticeable, I actually think it looks quite cool.
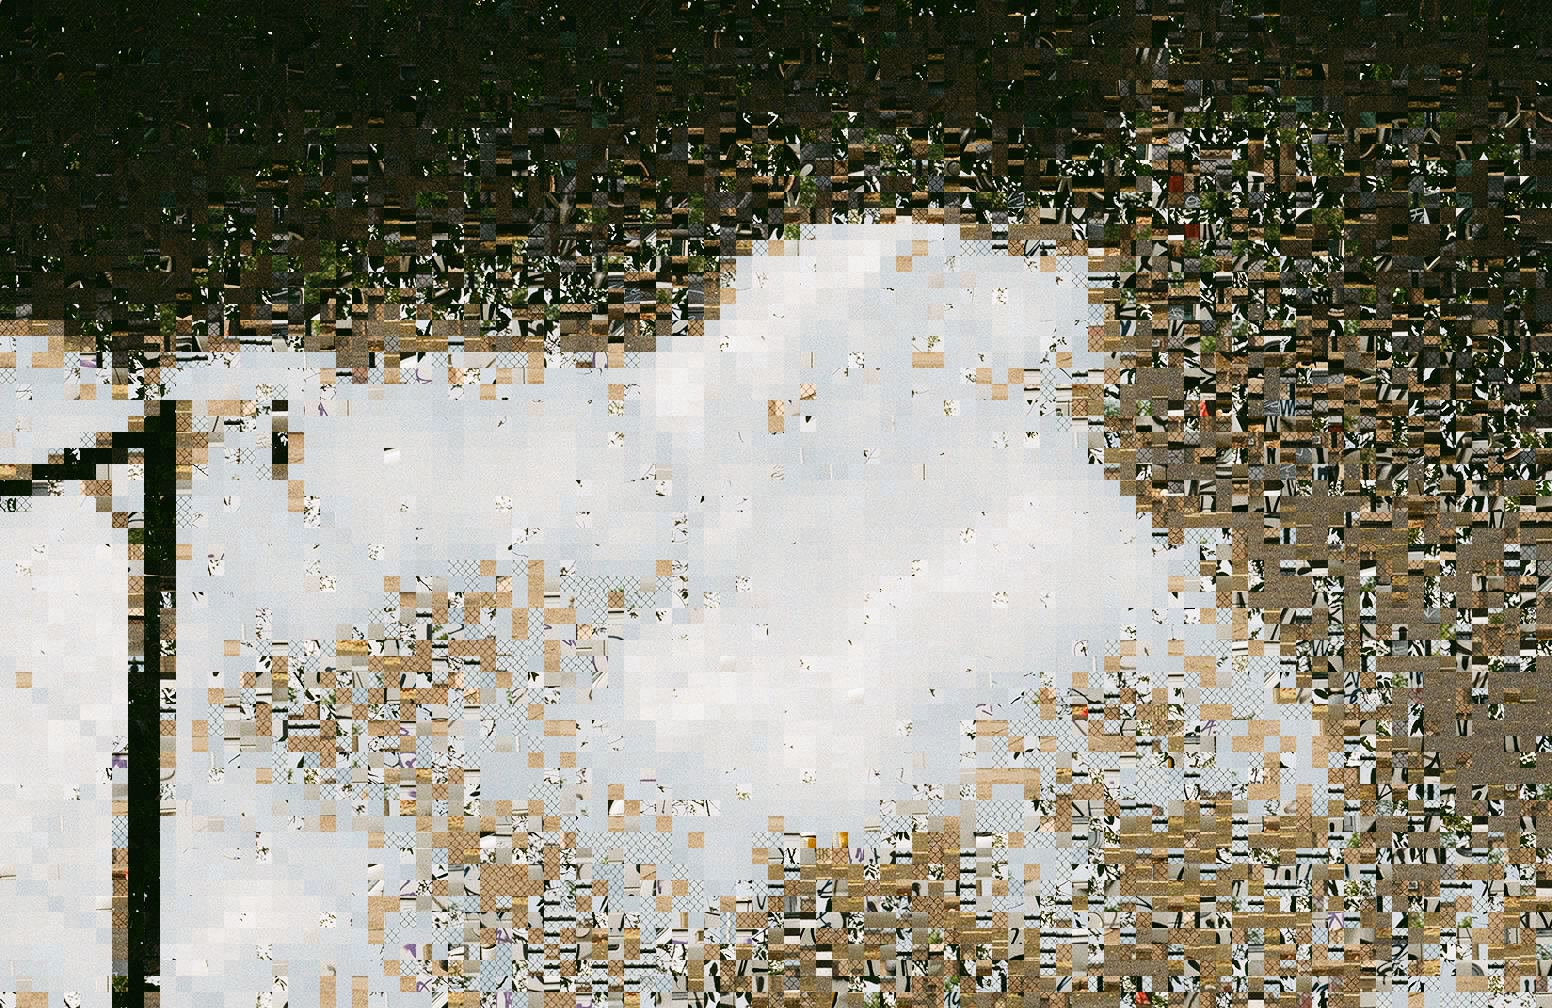
For example, take the output of these two images.
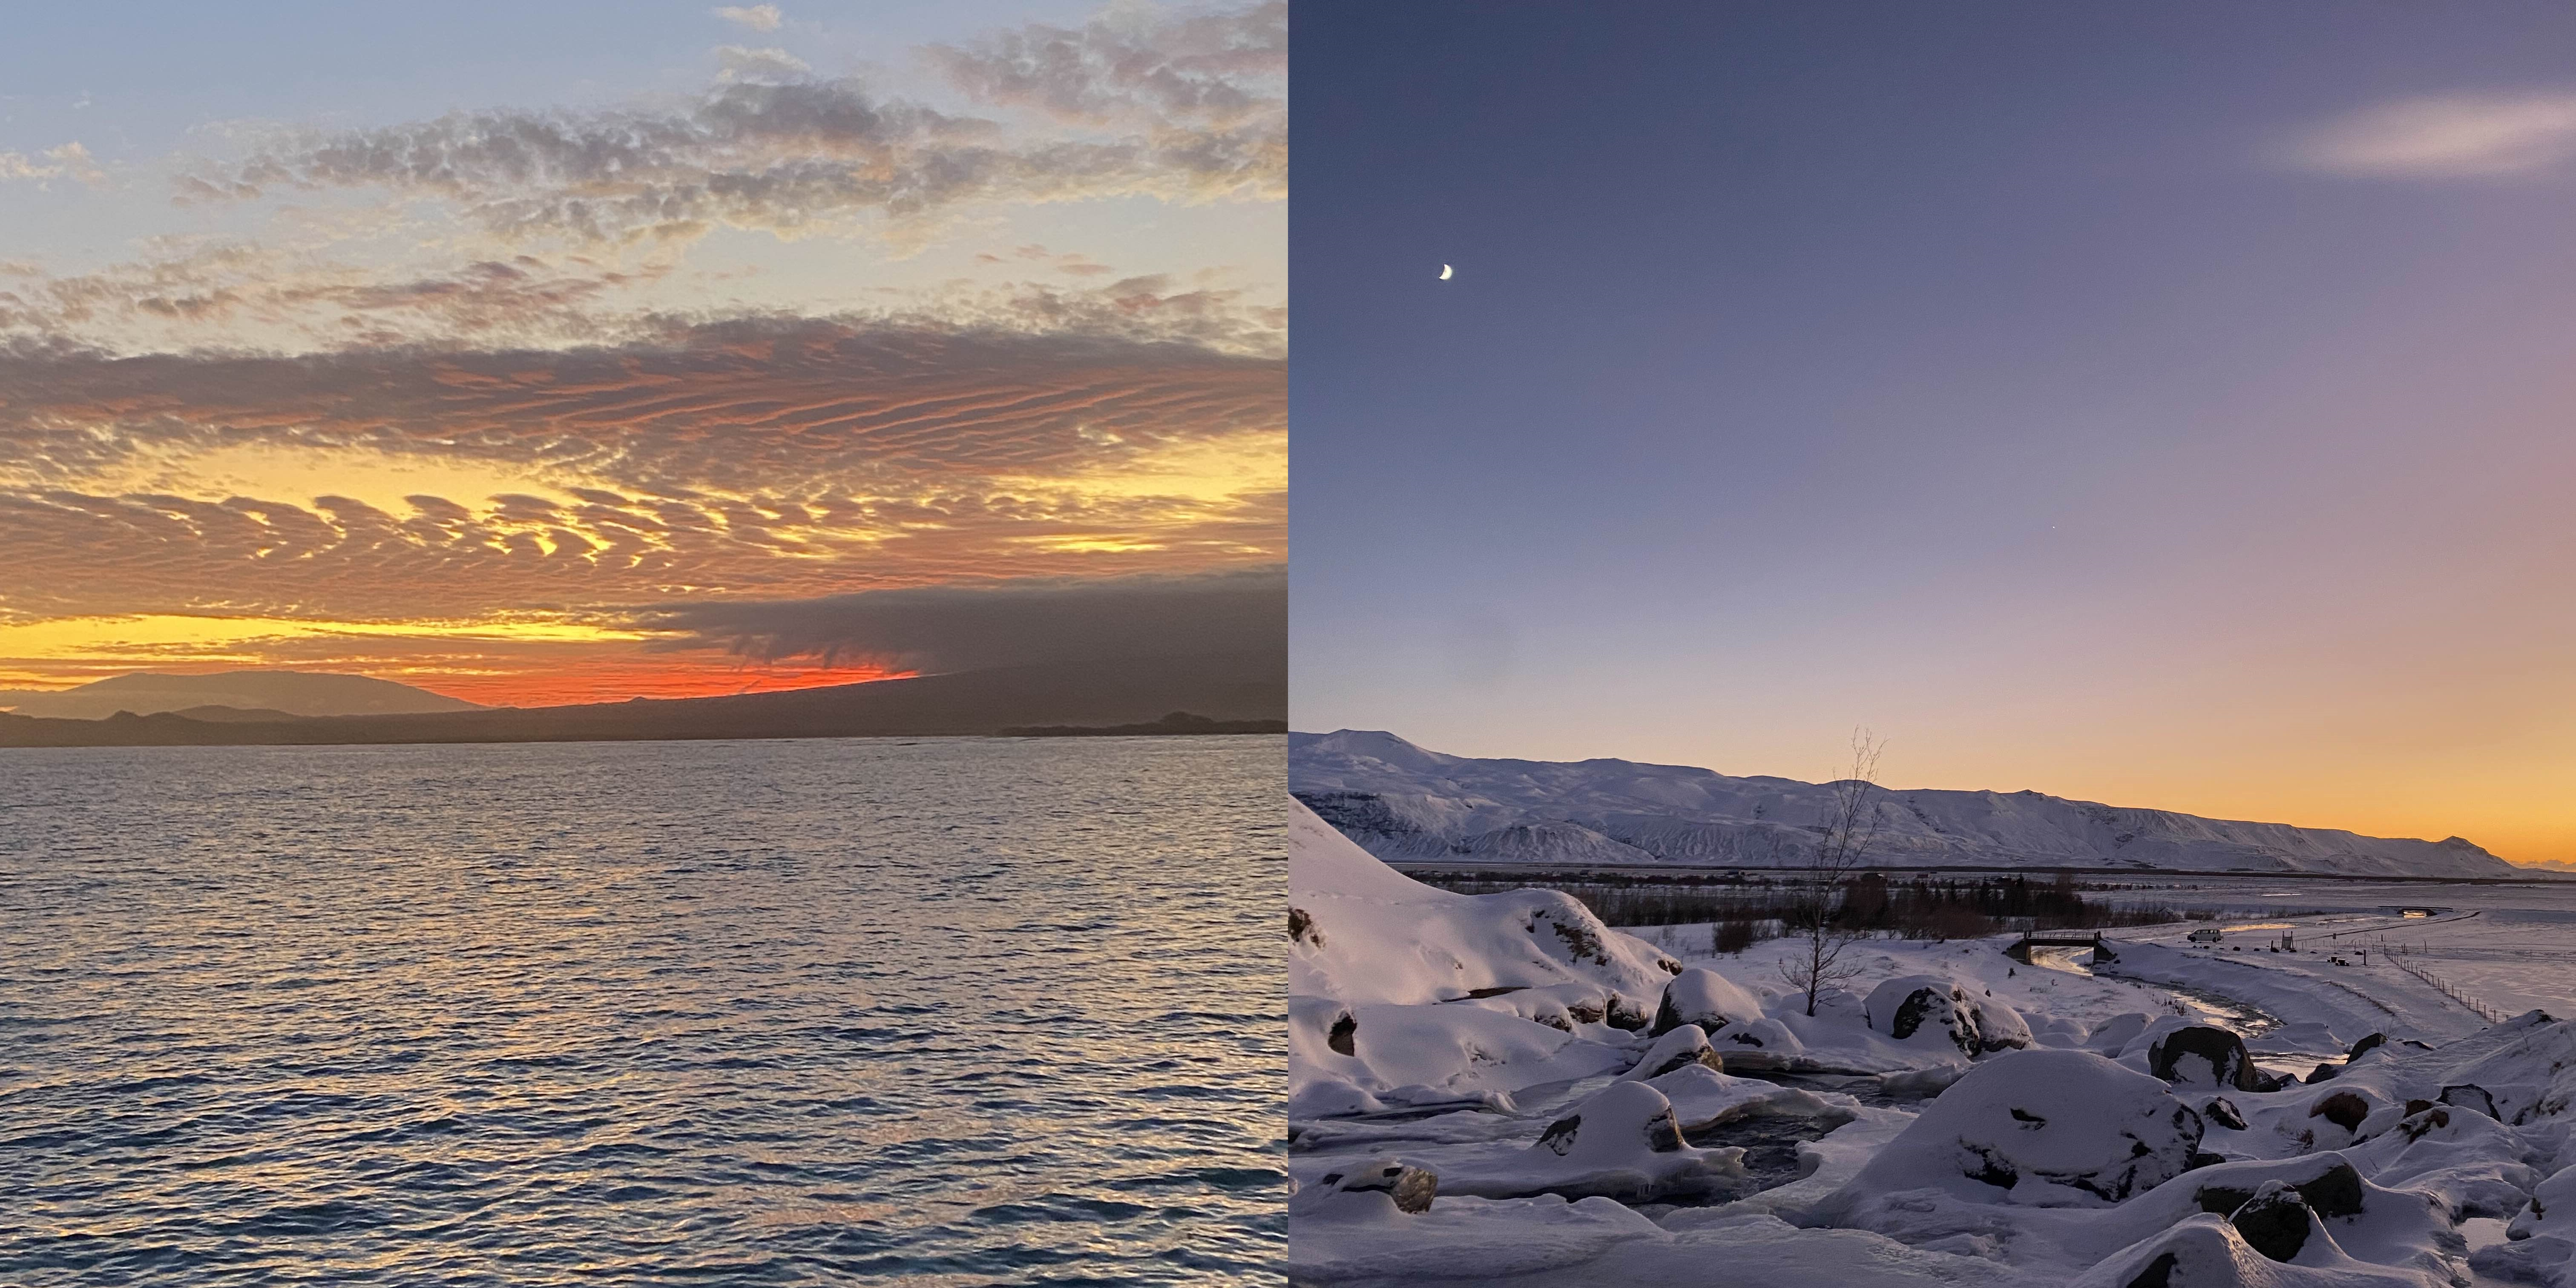
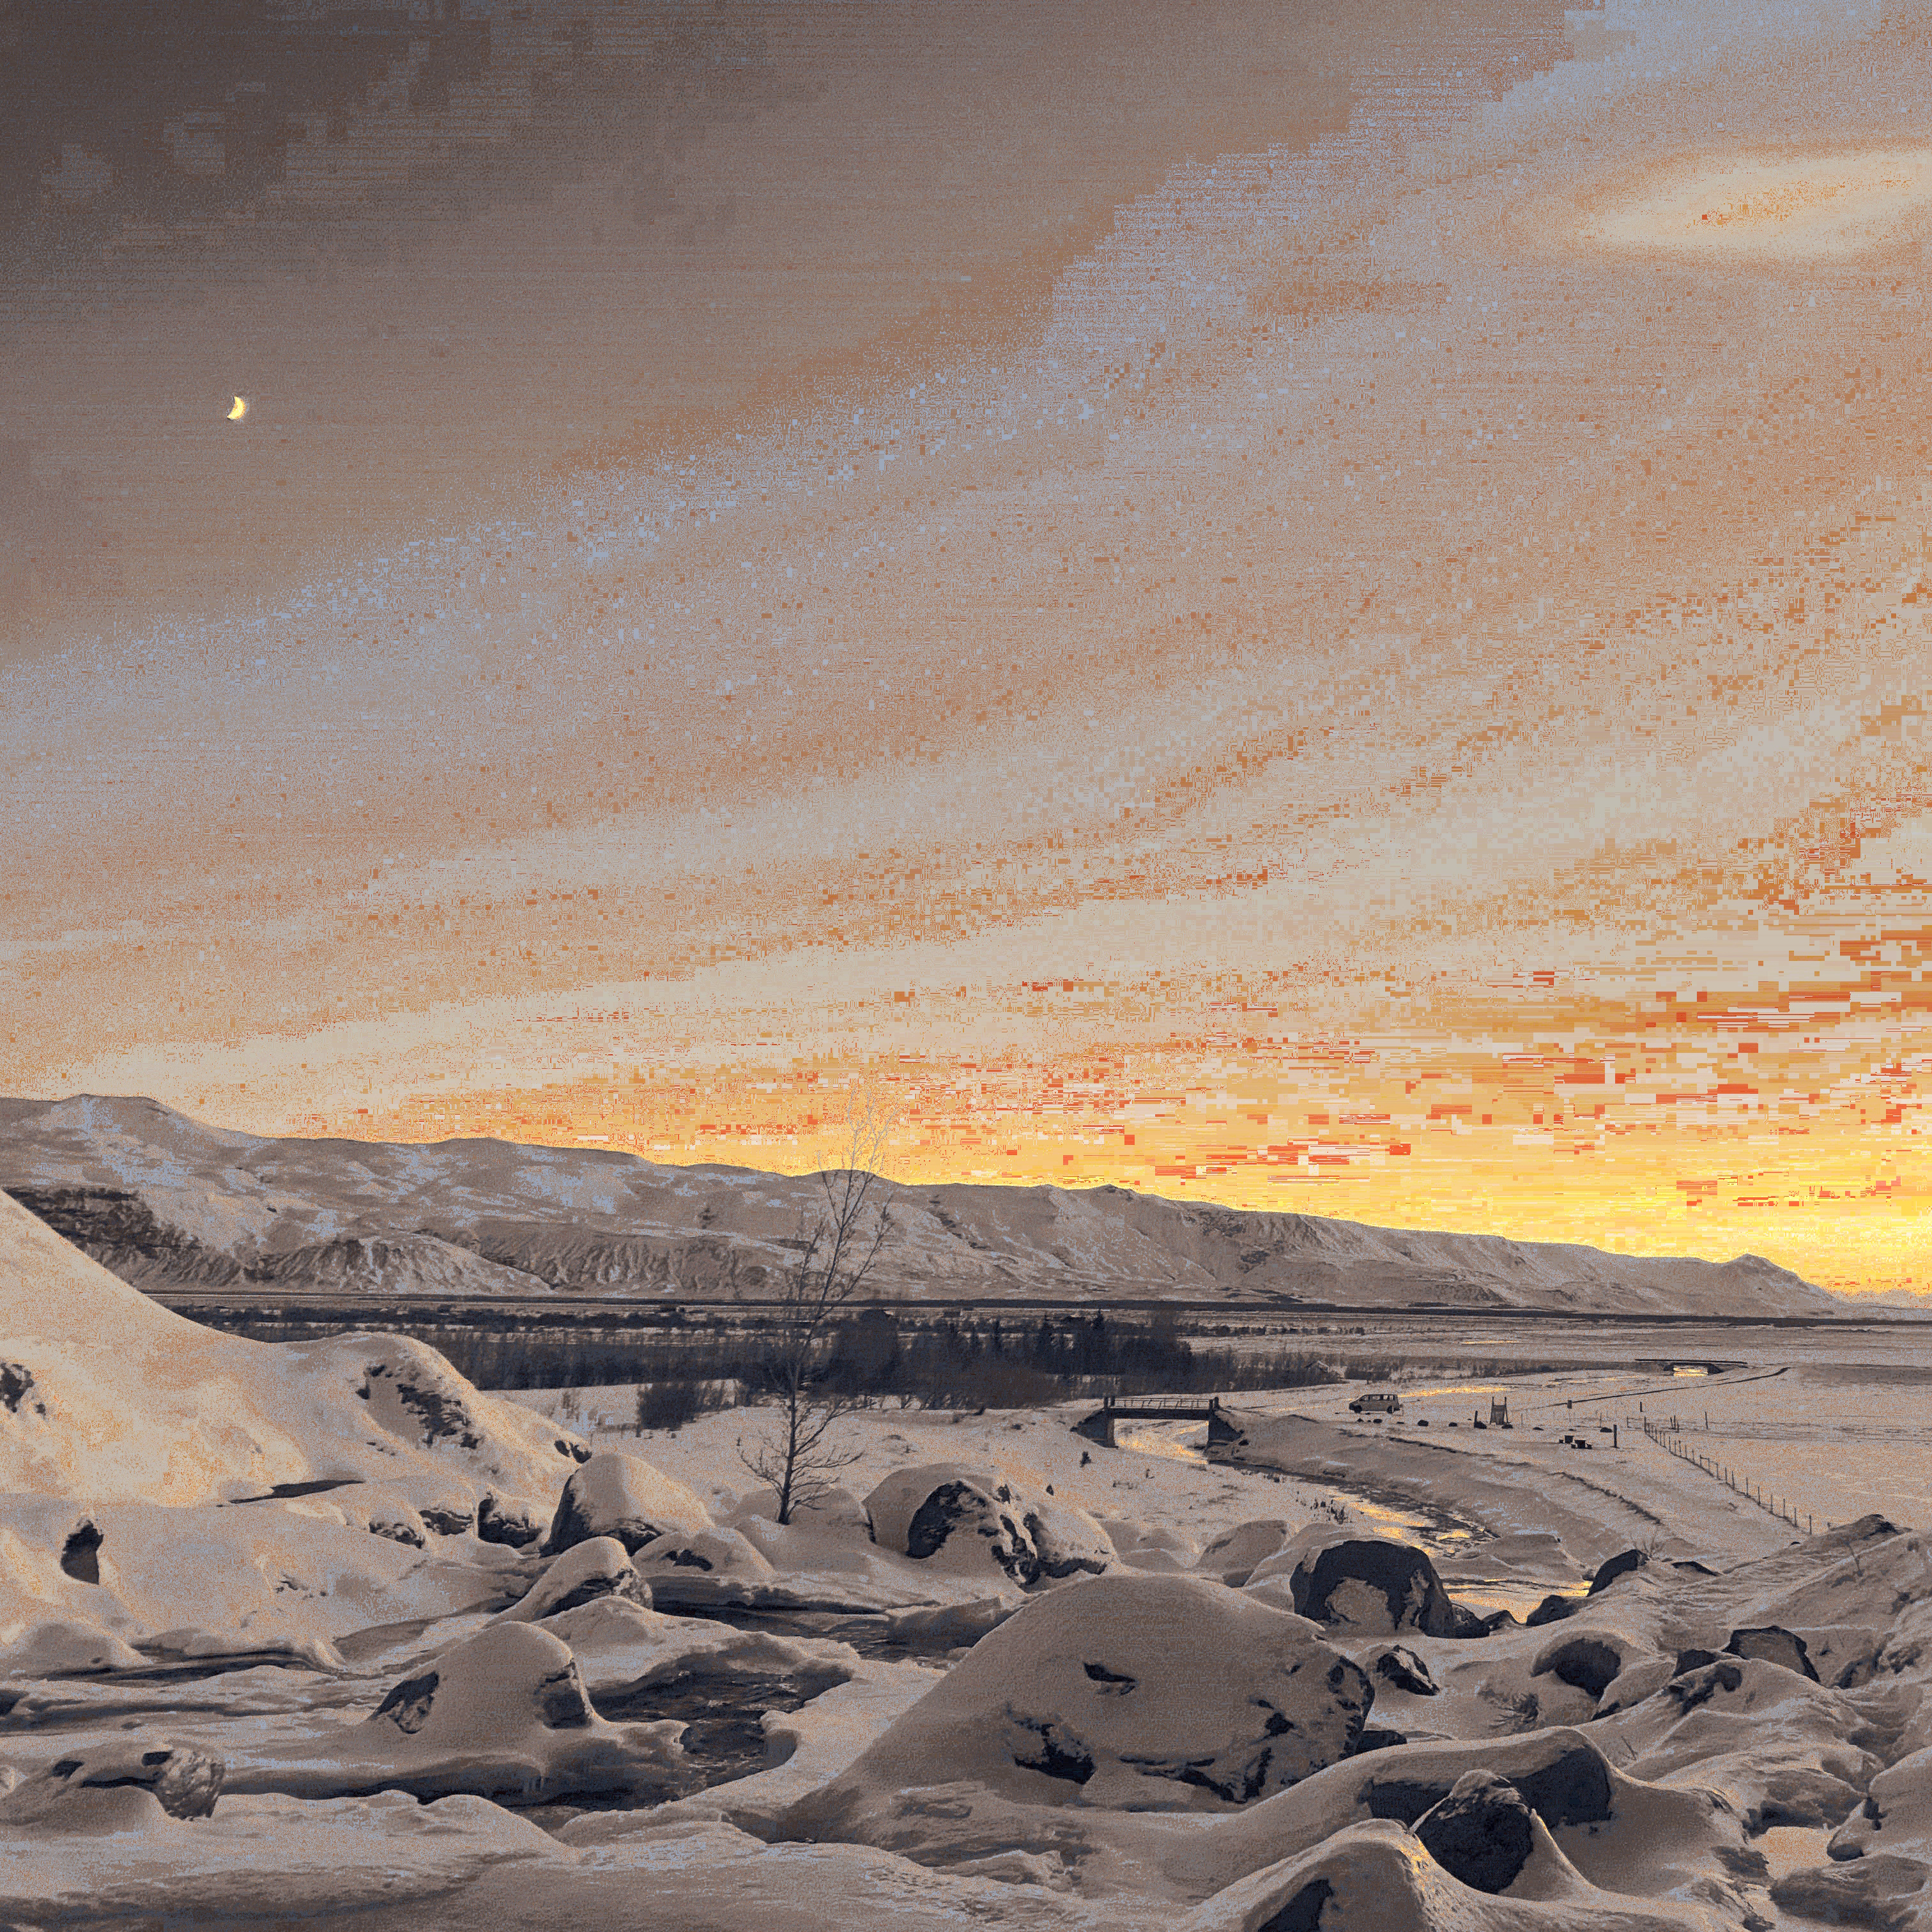
The red dominated color sorting is extremely apparent near the horizon. Giving it this awesome, blocky, glitchy look.
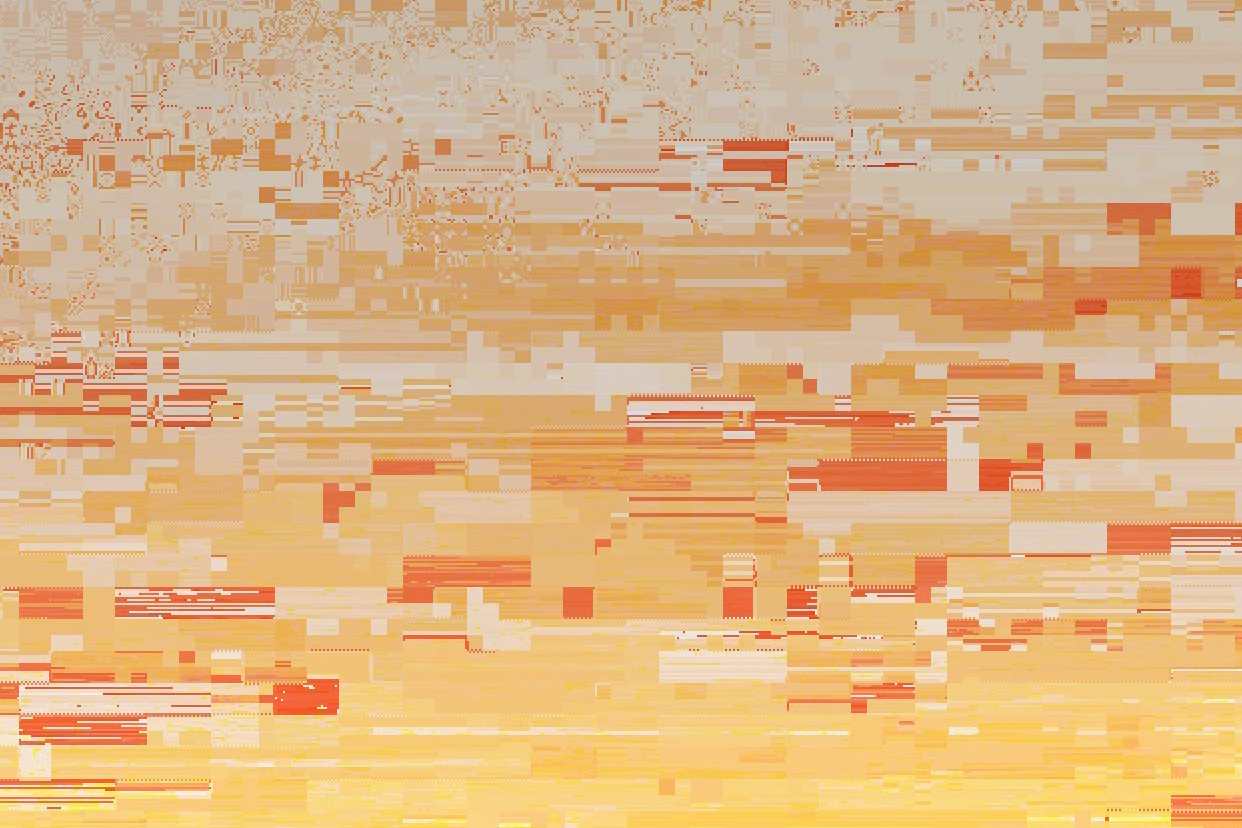
I suspect there’s additional factors which make it so prominent in this photo, but it looks cool and I don’t want to fix it.
Anyways
That’s that, and this is this, and now we’re done. Here’s an image of the van, recreated from an inverted version of itself.
All in all, the whole thing is only a couple hundred lines of code—and most of that is handling the bitmaps and making sure I don’t corrupt their DNA.
This whole AI thing makes it a scary time to learn to use em dashes.